
One of my favourite things about cloud managed networks is the API. The Meraki Dashboard API (Application Programmable Interface) allows you to create and configure organisations, networks, devices, SSIDs, and policies—using authenticated HTTP requests and JSON responses.
The ability to automate configuration changes in your network is a massive game changer, especially when operating with large corporate networks.
I have been using the Meraki API with PowerShell and Python for a few years now.
In my last role, we were deploying thousands of Meraki devices every year and needed a better way to deploy and manage configuration changes. Meraki Network Templates were just too rigid for the flexibility we wanted, so we looked to the Meraki Dashboard API.
With some help from my colleagues, I wrote scripts to import devices, name devices, configure ACLs, switch ports, SAML roles etc. It took a little bit of time, but the benefits were definitely realised at scale.
The benefit to Meraki Dashboard API is customisation. As long as you can write the logic and present it in JSON format, the possibilities are endless!
Meraki Dashboard also has a fantastic reference guide for its APIs. Check it out here: https://developer.cisco.com/meraki/api-v1/introduction/
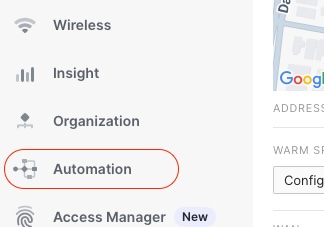
As you can probably tell, I am a fan of automation so when I stumbled across this new section in the Meraki Dashboard called Automation I had to check it out!
Meraki Automations
The part I’m excited about is within the Automation section and is called Workflows. I had a hard time finding documentation on Workflows, except for this shiny new article which was published today – check it out here: https://documentation.meraki.com/Workflows/Overview
Without much documentation, I had to have a play around to see what it could do. It’s basically a drag and drop automation builder that is run from within the Meraki Cloud. It can interact with the Meraki Dashboard, other Cisco products like ISE and FMC or any other API with a HTTPS endpoint. It is great for integrations with other products!
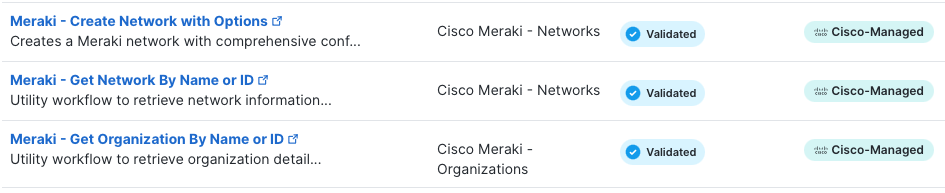
Cisco have created some of their own ‘Cisco Managed’ workflows that you can use, or you can create your own. I wanted maximum flexibility, so I came up with a simple Use Case and decided to create my own
Workflow Elements
Before I dive into my Workflow, I thought I’d explain the different components.
When you open a new Workflow, there are two different elements you can ‘drag and drop’.
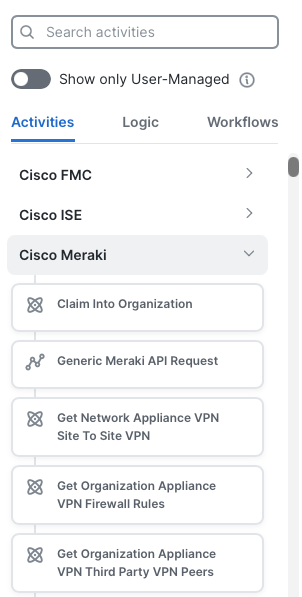
Activities
Put simply, activities are pre- configured actions you can execute based on a few variables. Some relevant for my Use Case are:
- Meraki – Get Organisation Networks
- Meraki – Create network Wireless SSID Identity PSK
It appears that most of the Meraki APIs are already included as activities.
Logic
Logic is loops, conditions and blocks/grouping. It helps to structure the logic of your workflow. Groups can be used to organise activities into logical sections.
Workflow Properties
Each Workflow has a few properties you should supply.
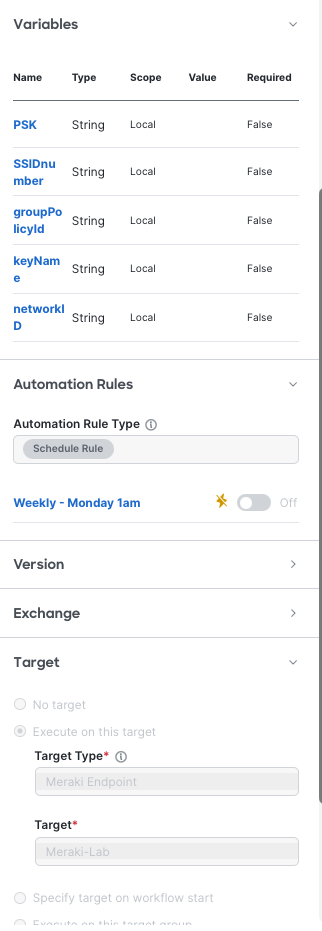
Variables
As the name suggests, variables are objects you can reference within your Workflow.
Setting these globally makes it easy to modify the script to suit your needs next time you go to execute it.
Automation Rules
Automation Rules are the settings that define when the Workflow should run.
I set mine to a ‘Scheduled Rule’ and created a Rule for 1am on Monday mornings.
Targets
Targets are what Workflows act ‘against’ – things like API endpoints or SMTP servers.
I configured one for the Meraki Dashboard – it was mostly pre-populated but I had to supply my Meraki Dashboard API key.
My Workflow
As I mentioned earlier, the mission I gave myself was to create a Workflow to configure a new randomised iPSK passphrase with an expiry date of 14 days. This could be used for Guest networks to automatically generate and cycle passphrases.
I started by creating a ‘Workflow with Automation Rule’, this allowed me to configure the Workflow to run on a schedule. I configured the schedule to run at 1am each Monday.
Next, I broke my Workflow into the following Logic Groups:
- GenerateKeyName
- GenerateKey
- GetKeyExpiry
- GetNetworkID
- GetSSIDNumber
- GetGroupPolicyID
- ConfigureiPSK
GenerateKeyName
I wanted the name of the key to have the date it was created as part of the name. I used the following Activities to create a KeyName variable to be used later on.
- Format Date – this is a Core activity that gets the current date and formats it as per your requirements.
- Set Variables – this is also a Core activity that updated the value of a variable – in my case the name of the iPSK.
GenerateKey
I needed to automatically generate a key.
- HTTP Request – there was no random string generator so I decided to use ‘randomnumberapi.com’. It has an API that generates a random string.
- JSONPathQuery – this is a Core activity that I used to extract the random string from the HTTP response.
- Set Variables – as above, I used this one to set the variable I created for my PSK.
GetKeyExpiry
I needed to define the date and time this new iPSK would expire.
- CalculateDate – this is another Core activity that I used to generate the expiry date for the iPSK. It added 1209600 seconds to the current time to generate the date/time in 14 days.
GetNetworkID
I needed to locate the NetworkID for use later on.
- Meraki – Get Organisation Networks – this is a Meraki Dashboard activity that I used to find the network ID for my network based on the name.
- JSONPath Query – extracting the network ID from the HTTP response.
- Set Variables – as above, I used this one to set the variable I created for my networkID.
GetSSIDNumber
I knew the name of my SSID, but I needed to locate the SSID number to create the iPSK against.
- Meraki – Get Network SSIDs – this is another Meraki Dashboard activity that I used to find the SSID number for my SSID based on the name. It referenced the NetworkID variable.
- JSONPath Query – extracting the SSID number ID from the HTTP response.
- Set Variables – as above, I used this one to set the variable I created for my SSID number.
GetGroupPolicyID
I also knew the name of my Group Policy to link with my iPSK, but I needed to locate the SSID number to create the iPSK against.
- Meraki – Get Network Group Policies – this is another Meraki Dashboard activity that I used to find the Group Policy ID number based on the name. It also referenced the NetworkID variable.
- JSONPath Query – extracting the Group Policy ID from the HTTP response.
- Set Variables – as above, I used this one to set the variable I created for my group policy ID.
ConfigureiPSK
Tying everything together, this activity referenced all the variables created in the previous groups and created the iPSK.
- Meraki – Create Network Wireless SSID Identity PSK – this is another Meraki Dashboard activity that created the new Identity PSK based on all the variables created in the previous groups.
SendEmail
This one I ran out of time to create, but it would send an email to whoever needs the key. Without this, someone would need to go digging into the Meraki Dashboard to find the key!
- Email – Send Email – this activity is an ‘Email’ activity that could be used to send the new key and its expiry date to an email address. You’d need to provide an SMTP server for this as the custom target (eg. SMTP2Go).
Leave a Reply